 In this tutorial, I will explain how to install an OpenVPN access server on an Ubuntu Azure IaaS Virtual Machine.
OpenVPN is an open source software that allows to create VPN connections.
The advantage of creating and using your own VPN server is that you control where is going your data through. When using a public VPN, you have to trust the provider.
The advantage of using public cloud as Azure, is that you don’t have to worry about hardware infrastructure and you pay as you consume.
Please take note that you will be limited to 2 concurent connections.
Before starting you will need:
- A Windows Azure Subscription enabled.
To create one: https://account.windowsazure.com/Home/Index I am using a MSDN subscription.
- PuTTY software installed on your computer. By default, Ubuntu Server on azure does not have graphical interface, we will use PuTTY to connect in SSH to the VM.
To download PuTTY: http://www.putty.org/
This tutorial is in three steps:
- VM creation and settings
- Server installation and configuration
- Client configuration
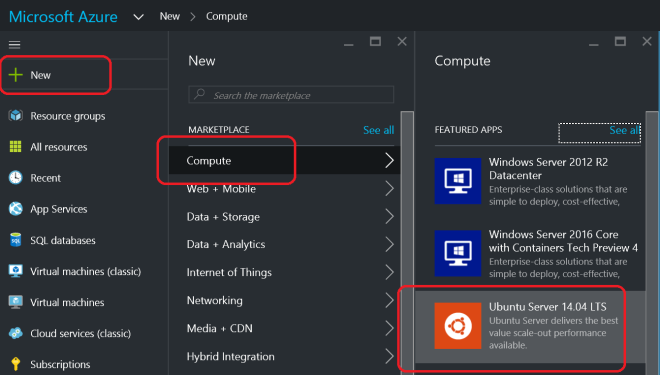
Creating an Ubuntu 14.04 Server on Azure.
- From the Portal: http://portal.azure.com
- Click New, then Compute, then choose the “Ubuntu Server 14.04 LTS“
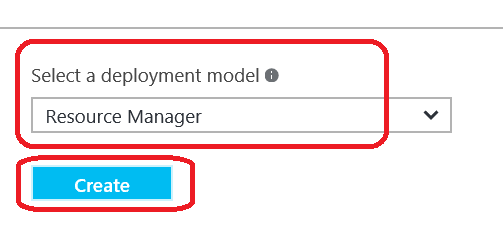
- Choose the new model Azure Resource Manager and click Create.
- Choose a Name for your server, the administrator Username, a strong Password, set a Resource group (I name it with the same name than the server) and choose the Location.
For the location I advise you to choose the closest one. To test the latency between you and all Azure Datacenters go to http://www.azurespeed.com. Once done, click OK.
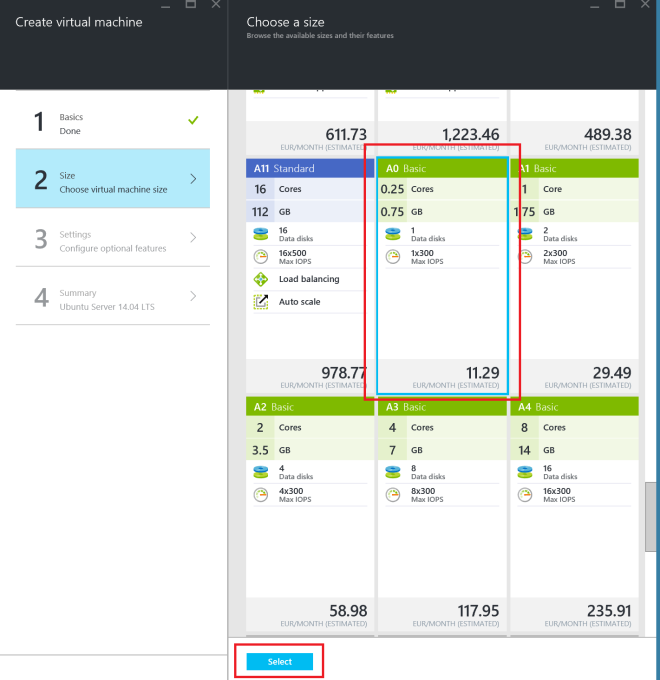
- Choose a Size: the price will depend on it. I choose the cheapest one: A0 Basic VM, 11.29€/month estimated. This price does not include the storage (you pay as you go), the ingress traffic to the VM, the eventual reserved IP address… More information about costs: https://azure.microsoft.com/en-gb/pricing/faq/virtual-machines-how-do-instance-sizes-get-billed/. Click Select then.
- On the next pane “Settings”, click on Public IP address. To avoid loosing this IP let’s set a static one:
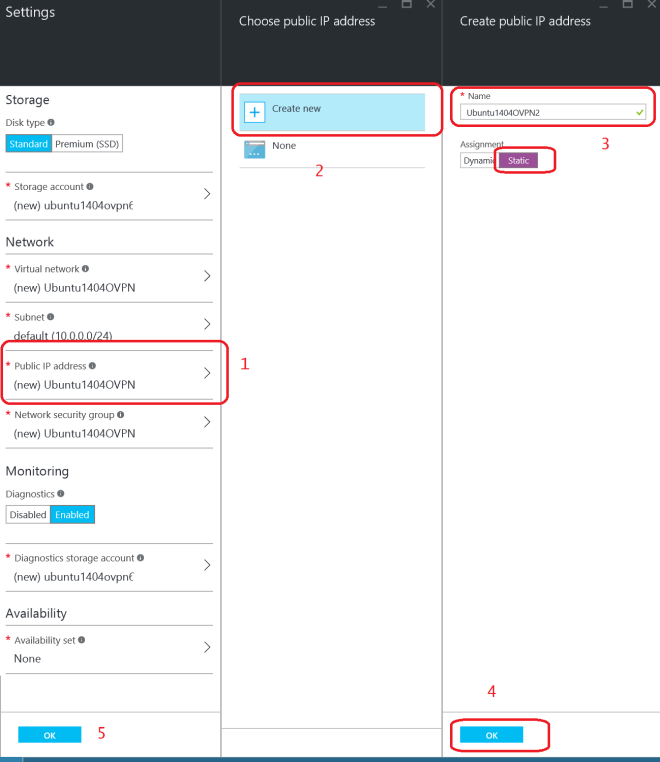
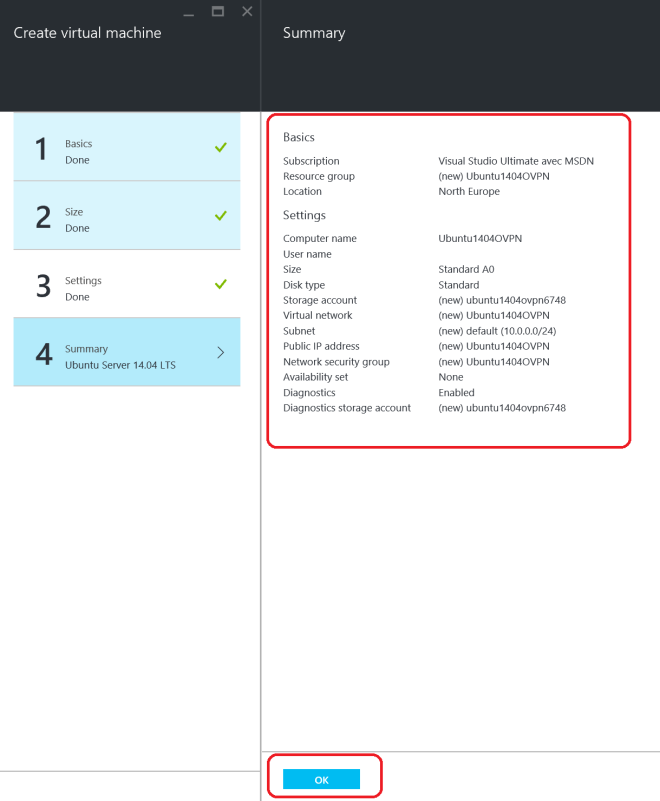
- Finally, review the settings and click OK.
 On the dashboard, you will see the VM creation:
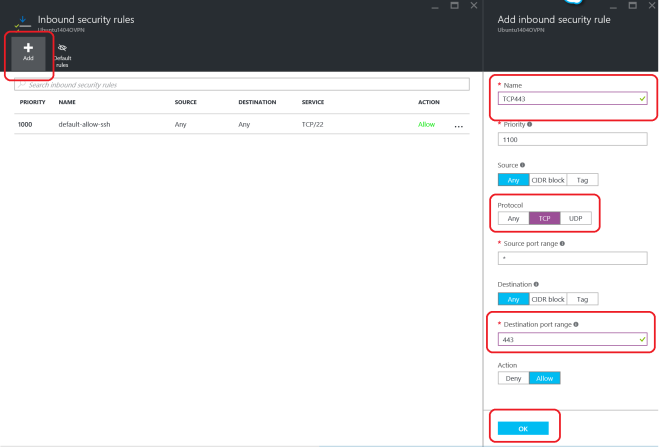
- Once the VM is created we will have to create Inbound rules: By default, only TCP on port 22 (for SSH) is open. To allow connection and management of the server you will have to allow: TCP on ports 443 and 943, UDP on port 1194. This could be done at Network security group level.
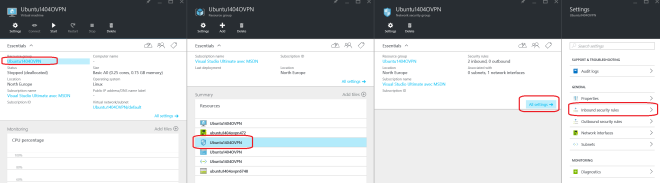
- Click on the newly created VM from the dashboard, then click on the Resource Group Name, here you can open the Network Security Group (the shield!), then click All settings, and finally Inbound security rules.
- You have to create three different rules. Let’s start with allowing TCP on port 443: Click Add, then set a Name for the rule, choose the Protocol (TCP), let the default source port range and set the Destination port range as 443. Click OK.
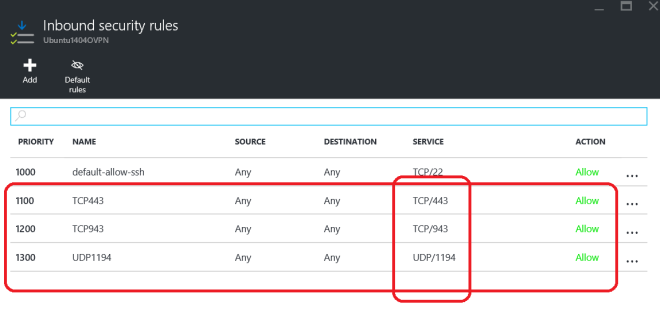
 Repeat the operation twice again with TCP on 943 and UDP on 1194.
- In the end it should look like that:
 If you have Classic Compute VM (and not an ARM VM), you have to set up the endpoints instead: https://azure.microsoft.com/en-us/documentation/articles/virtual-machines-set-up-endpoints/.
Setting up an OpenVPN server
The VM is now ready! We can now focus on the real goal: installing and configuring the server. And good news, it’s quite simple.
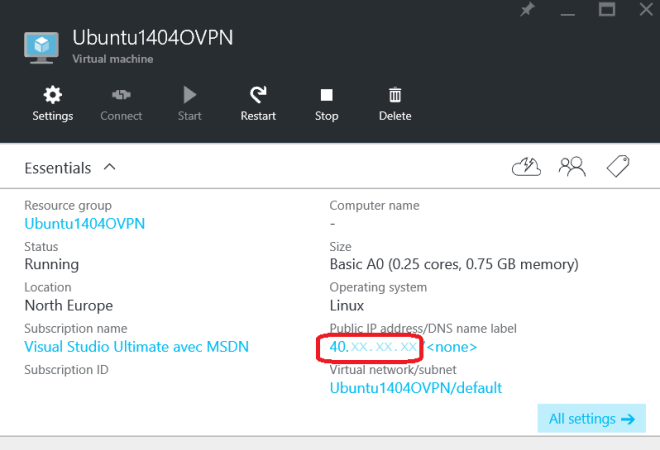
- From the portal, take note of the VM Public IP, we will use it to ssh to server:
- You can start PuTTY, past the Public IP, and click Open.
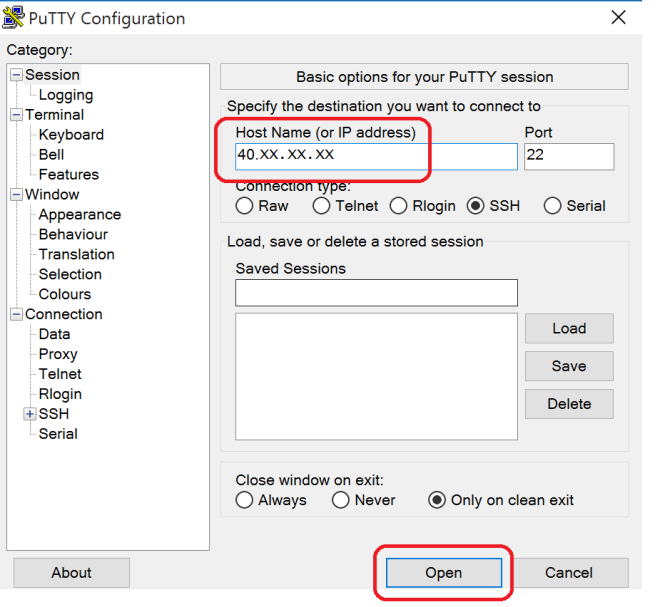
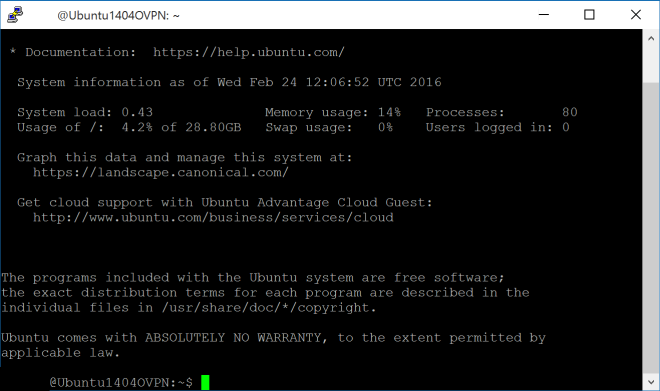
- Log into the VM using the User name and the Password set during VM creation.
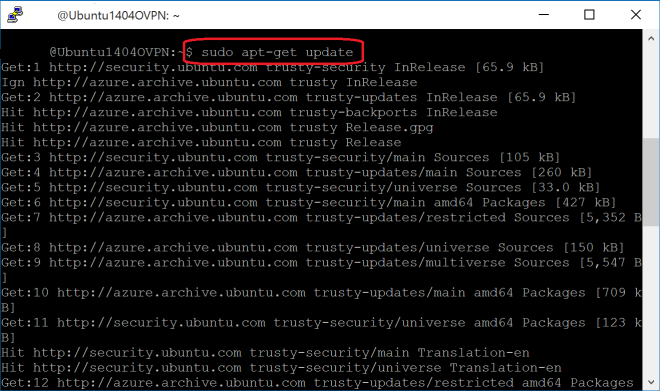
- Update the VM with:
sudo apt-get update
- Download the OpenVPN package for Ubuntu 14 amd/x86 64-bit with:
sudo wget http://swupdate.openvpn.org/as/openvpn-as-2.0.24-Ubuntu14.amd_64.deb
I wrote this article on February 2016, there might be a more recent version of this package when you read it. Find the latest version here https://openvpn.net/index.php/access-server/download-openvpn-as-sw/113.html?osfamily=Ubuntu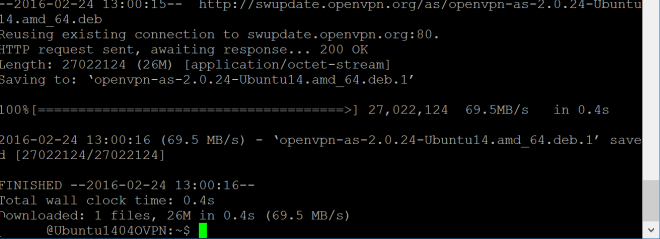
- Install the package with:
sudo dpkg -i openvpn-as-2.0.24-Ubuntu14.amd_64.deb
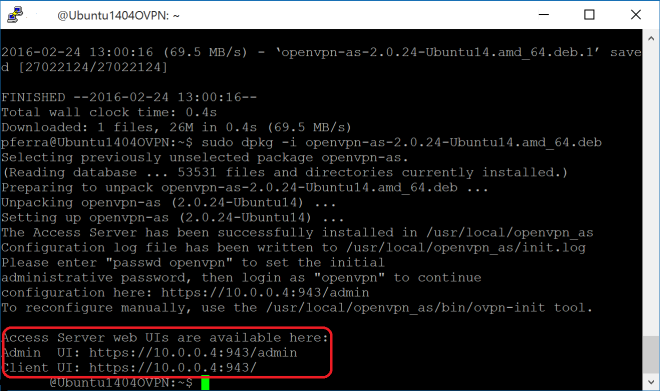
When the install is complete, two URL are displayed: the admin URL and client URL. But it’s the internal IP of the VM, you would need to be in the same virtual network than the VM to use it.
To access the server we will continue to use the Public IP (same one used for SSH)
- The admin username for the server is openvpn by default. Set a password for this admin with the command line:
sudo passwd openvpn

- Let’s create a user call john and a password for him with the following command line. You will use this non-admin user to connect your client to the VPN. There is no need to provide the additional details:
sudo adduser john
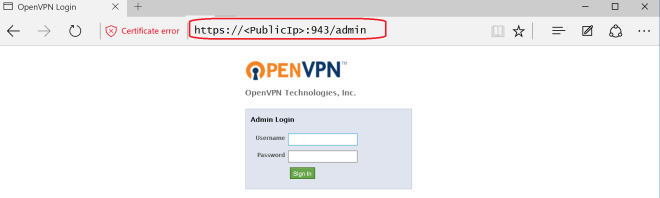
- Test the access to the administrator interface with https://PublicIP:943/admin, replacing <PublicIP> by the VM Public IP. After bypassing the certificate warning you reach the logon page where you can type ‘openvpn’ (the OpenVPN default admin username) and the password you set at step 7.
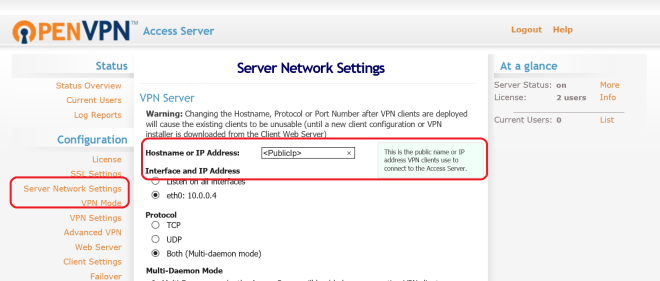
- On the admin interface, select Server Network Settings on the left pane. Then replace the internal ip (10.xx.xx.xx) with the the VM Public ip as IP Addresss. The VPN clients will use this IP to connect to the server. Then click Save Settings at the bottom and Update Running Server at the top.
Client configuration
The server is now ready to be used! Let’s see what we have on a client perspective.
With this free license you can connect a maximum of two clients. There are clients available for Windows, Mac OS X, iOS, Android, Linux.
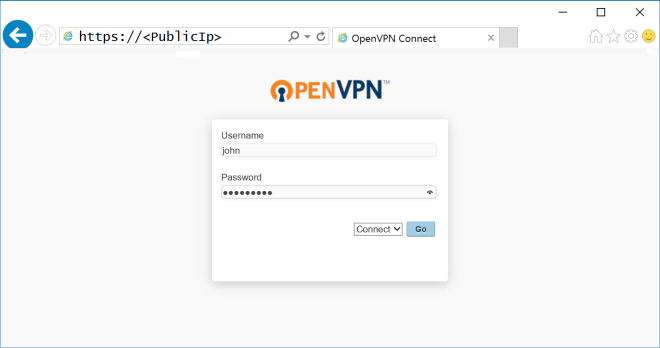
- You can download the Client by reaching the Public IP URL from your browser on your computer or your smartphone. https://<PublicIP>. Logon with the user name (non admin) and password set.
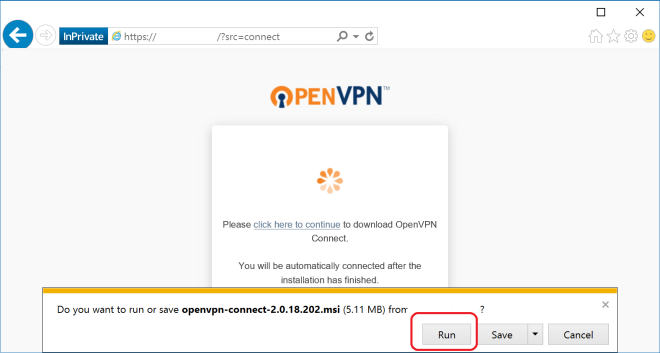
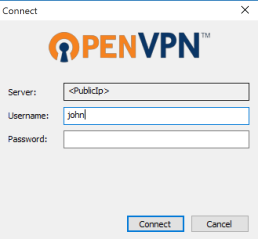
- When the installation is done, you can launch the client and connect to the VPN server.
Enjoy your connection!
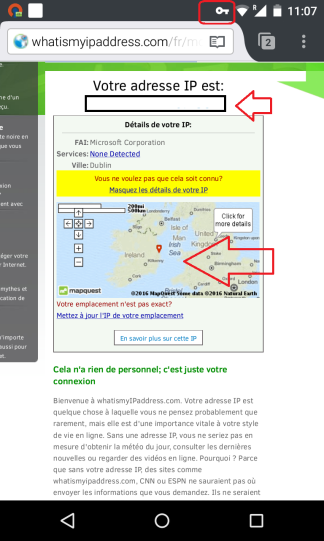
How to ensure your traffic is going through the VPN? Check the IP displayed on http://whatismyipaddress.com/. The IP should be the public IP of your Azure VM and the location: the Azure Datacenter (look, I’m in Dublin!)
Don’t hesitate to reach me if you have any question or noticed something incorrect in this tutorial, even a typo 😉
To go further you can consider:
Useful links:
